

I made these a few years ago for a cookie swap that I went to only it was mint and chocolate instead of with the vanilla.
I really liked the picture I saw of these on Vera's blog, Baking Obsession. You should definitely take a look at her site. Her recipes are wonderful and her pictures are absolutely amazing.
Her checkerboard cookies turned out...well, you just have to see it for yourself.
Unfortunately, mine not so much.
I posted on my Facebook page earlier today that I was ready to whip some cookie sheets across my kitchen because these were not turning out as I had hoped.
I was frustrated. I'm not gonna lie.
They're ok, but not the perfection I had been going for.
There's no pussy-footin' around this baking stuff.
When the recipes are challenging I'm going to let you know.
These cookies were time consuming and probably not something a novice baker would want to attempt.
I'm not telling you not to do it, I'm just trying to save you the frustration and save you a window should you start whipping those cookie sheets like a Frisbee.

Checkerboard Cookies - made 108 cookies (9 dozen)
From Baking Obsession
5 1/3 cups flour
1 teaspoon baking powder
1 teaspoon salt
1 pound (4 sticks) unsalted butter, room temperature
2 cups sugar
1 tablespoon vanilla
2 eggs, room temperature
1/2 cup unsweetened cocoa powder
Into a medium bowl, sift together flour, baking powder, and salt; set aside.
Using the paddle attachment of an electric mixer, cream butter and sugar until light and fluffy.
Add eggs, fully incorporating until adding the next.
Add vanilla.

Add flour mixture and beat until just combined. It may be necessary to finish mixing with a rubber spatula or your hands.
Divide the dough in half and knead the cocoa into one of the halves.

Divide the two halves of dough in half again so that you have 2 each of the vanilla and the chocolate.
Form each portion into a rectangle, wrapping each in plastic wrap, and refrigerate for 2 hours, minimum.
Dough can be refrigerated for up to one day.

Remove one rectangle each of the vanilla and chocolate dough and allow them to soften on the counter for 15-20 minutes.
Using parchment paper or a very lightly floured surface, roll the vanilla with a floured rolling pin into a rectangle 12 X 5-inches and 1/2-inch thick.

With a pizza cutter, cut the dough into (9) 1/2-inch wide strips.

Repeat the process with the chocolate portion of the dough, rolling it out into a 1/2-inch thick rectangle that measures 12 X 5 inches. Cut into (9) 1/2-inch thick strips.

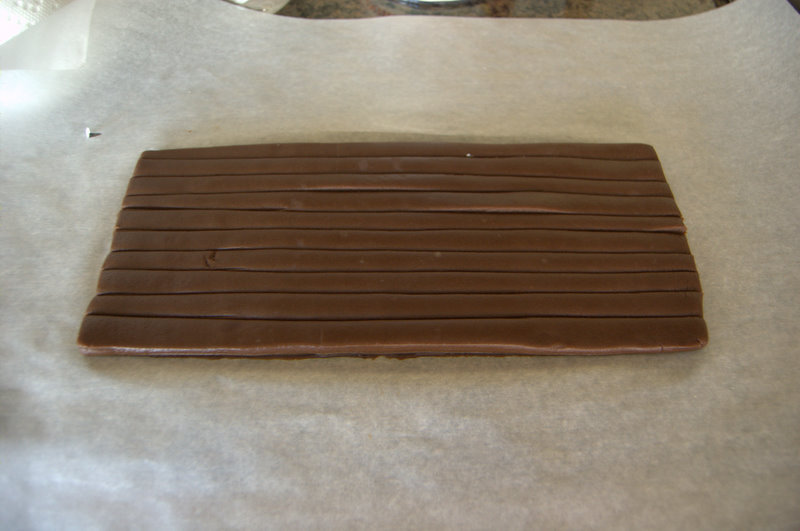
Form two checkerboard logs by alternating vanilla and chocolate strips. Each log will have a total of nine strips. The strips need to be handled extremely carefully as they may break. I returned some of the dough that I was not currently using to the fridge to chill while I worked with the other dough.

The above photo is wrong. I figured out after I took it that there should only be 3 strips on the bottom, not 5.
I fixed it.
And for some reason, I had cut 10 strips in the dough instead of 9.
Brain fart.
So with those two extra strips I made a very small log and just baked those separately.
Which. I. Ended. Up. Burning...

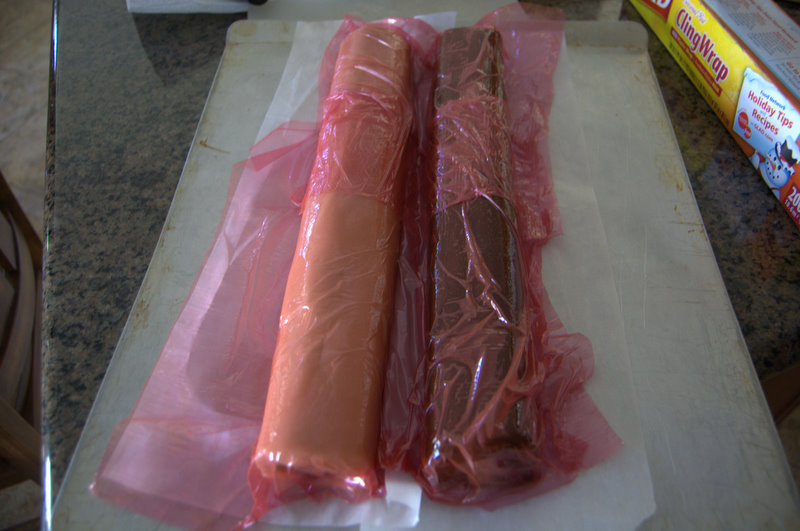
Cover both logs with plastic wrap, transfer to cookie sheet and refrigerate for at least 2 hours.
After the logs have been refrigerated for 2 hours, remove the remaining vanilla and chocolate dough and allow to sit on counter to soften for 15-20 minutes, leaving the logs in the refrigerator.
On parchment paper, roll the vanilla dough into a 12 X 6-inch rectangle that is 1/3-inch thick.

Place the refrigerated log with the vanilla corners into the center of the vanilla rectangle with long sides parallel.

Using the parchment paper to assist you, fold the dough up and around the log, pressing firmly along all sides to secure.

Gently roll the finished checkerboard log from side to side to form sharp corners.

Wrap in plastic wrap and refrigerate overnight to obtain the best uniformed cookie.
Repeat process with chocolate dough and remaining checkerboard log.


At this point the logs can be frozen for later baking. If doing so, thaw them in the refrigerator overnight before using.
When ready to bake, place a rack in the center of the oven.
Preheat oven to 350 degrees F.
Prepare a cookie sheet by lining it with parchment.
Remove one log from the refrigerator and using a very sharp knife, cut into slices 1/4-inch thick.
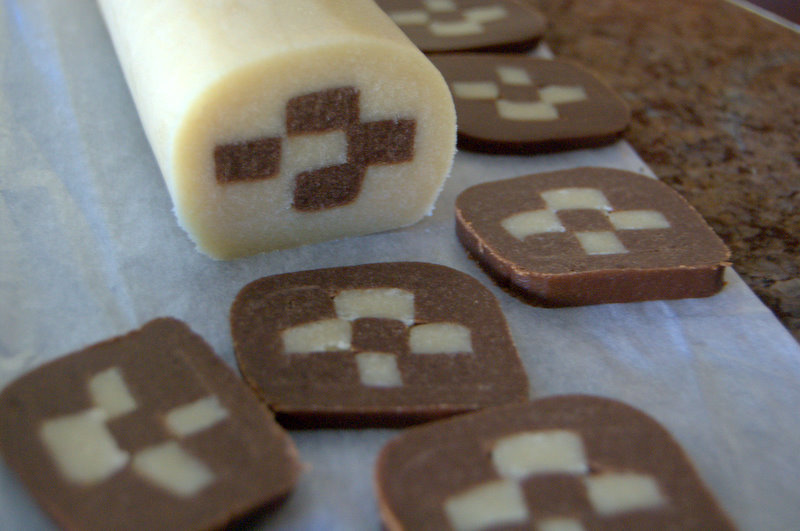
Place slices on prepared cookie sheet leaving a 1-inch space in between them as they will spread.
Bake the cookies for 10-12 minutes being very careful to watch that they do not brown. You just want them to be set. If they brown, the contrast between the chocolate and vanilla will lose its' effect.
Place the cookie sheet on a wire rack to cool for 15 minutes before transferring the cookies to the wire rack to cool completely.

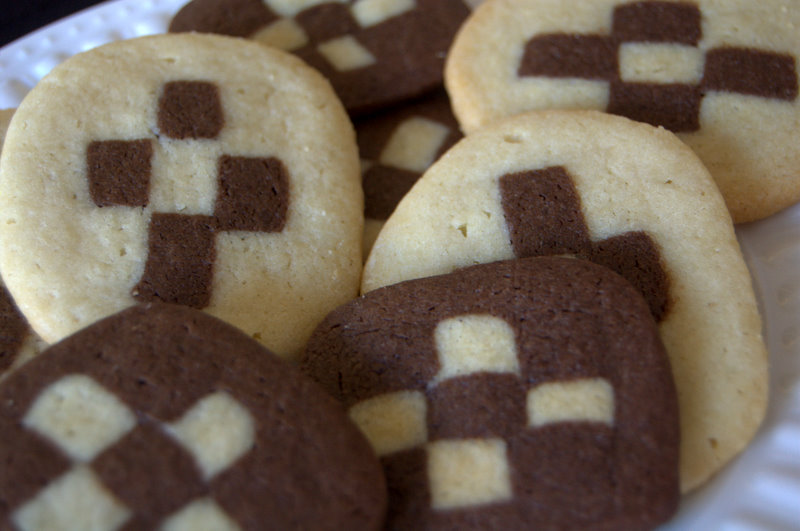
I rate everything I bake on a scale of 1-4 with 4 being the best and these Checkerboard Cookies earned 3 1/2 rolling pins. They would have been a 4 if I had been happier with the way the design turned out. But at least all of them didn't look like this:

Yes, these were the rejects, but they still tasted good. I like eating a vanilla cookie with chocolate or a chocolate cookie with vanilla. I think I'll go get me one now...
No, they were not the easiest cookies to make, but it is really neat to see the end result. If you have the courage and patience enough to make these, I know that you will be very proud of yourself.
You can do it.
There are videos on YouTube for Checkerboard cookies which you may find helpful.
Some of them suggest laying the rolled out rectangles on top of each other, refrigerating and then slicing into strips. That was the way I had done the chocolate mint cookies I made a few years ago, and I actually thought that was an easier way to do it than this.
Also, they may suggest brushing each layer with egg white to make the pieces adhere, but as Vera said in her post, the strips will stay together if a lot of flour is not used to roll the dough out.
Vera had also made up a Checkerboard assembly diagram which is helpful, so I suggest taking a look at that.
Have fun with them.
Try something new.
Expand your horizons.
Because after all, isn't that what baking should be about?
I give you BIG baking hugs and muffins!!
No thanks!!! Far too much work and far too much precision. But they really look fabulous!!!!
ReplyDelete